Creating and Animating a Droplet hitting a body of water
| Step 1 | Creating and Animating a body of water |
| Step 2 | Adding and Animating the ripples |
| Step 3 | Creating and Animating the Water Droplet |
| Step 4 | Creating a Water Material |
| Step 5 | Rendering the Scene |
| Step 1: Creating & Animating a body of water |
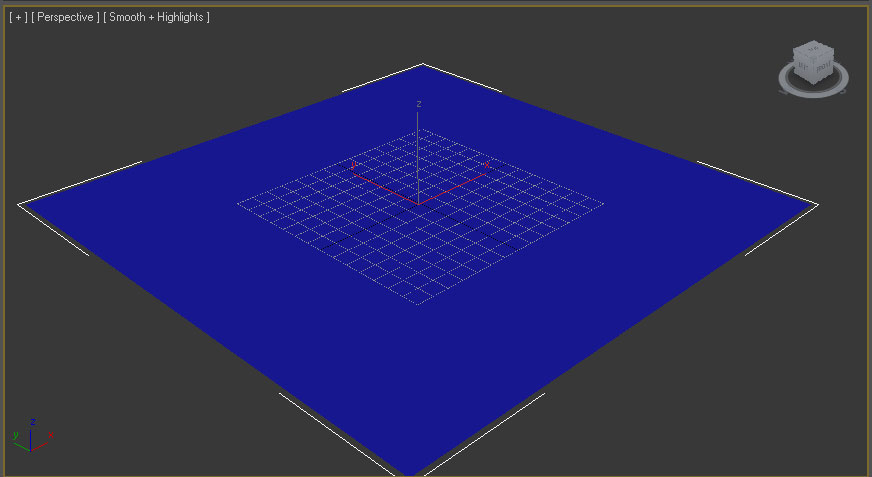
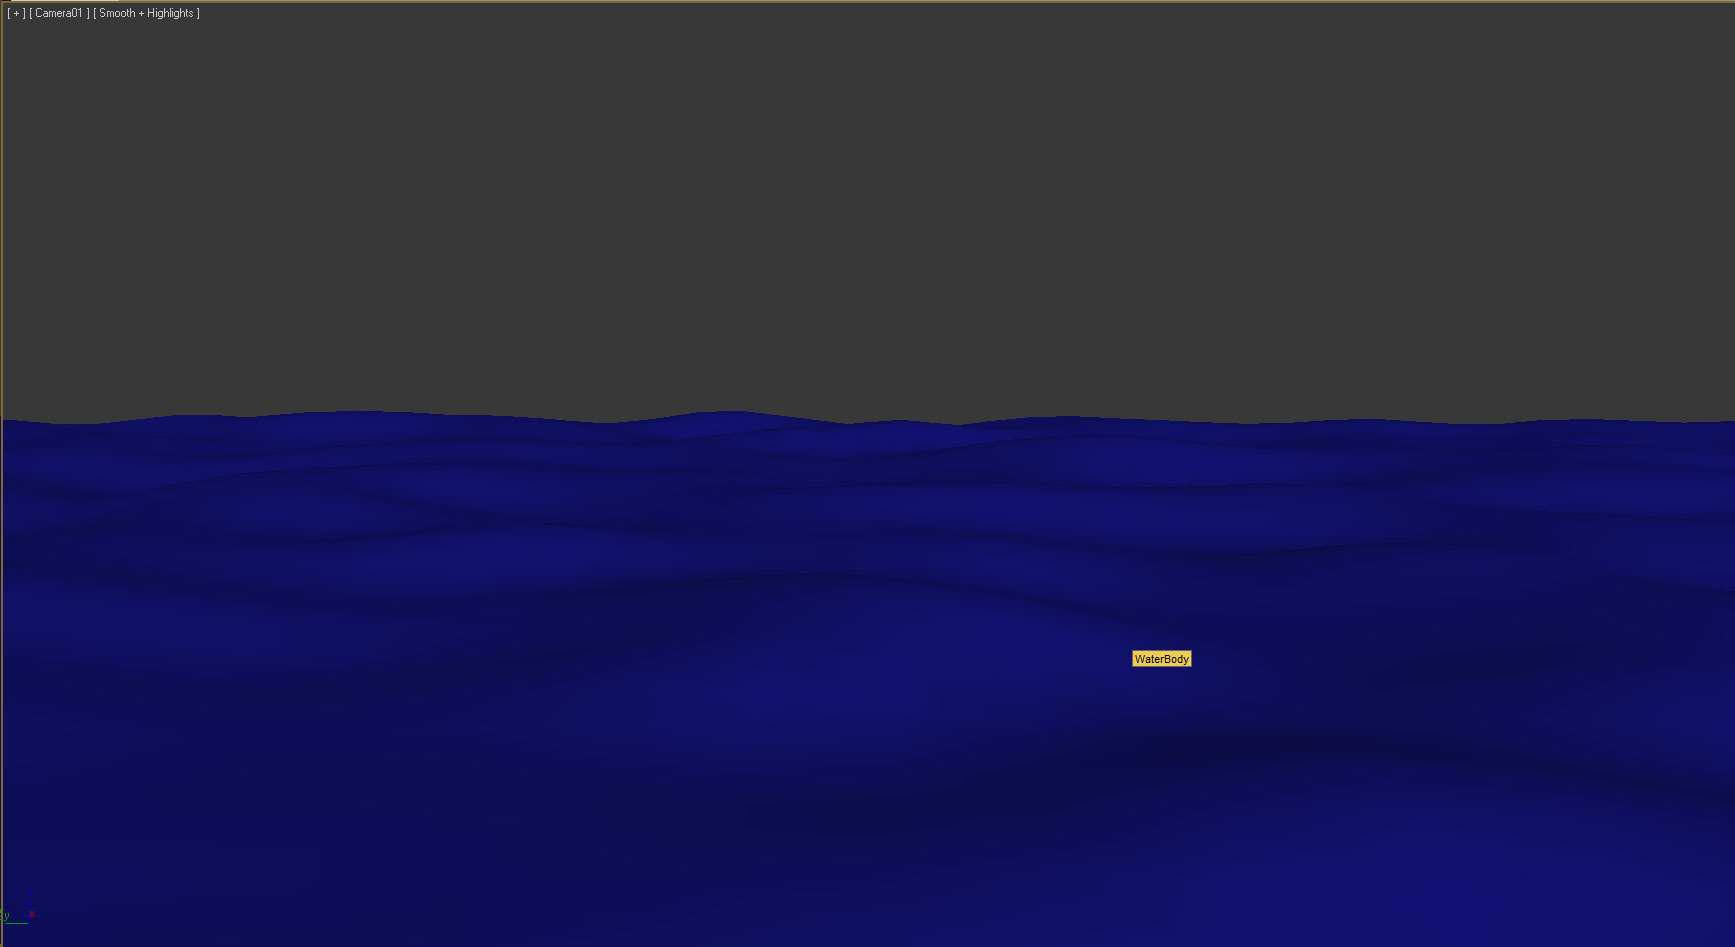
Before the droplet hits the water and our ripples are animated, lets begin with a simple body of water with a few swells.
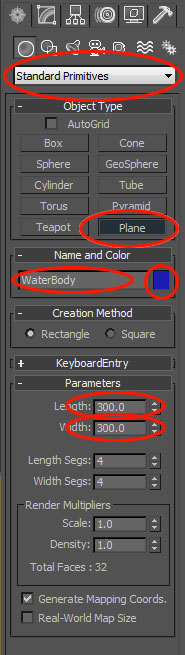
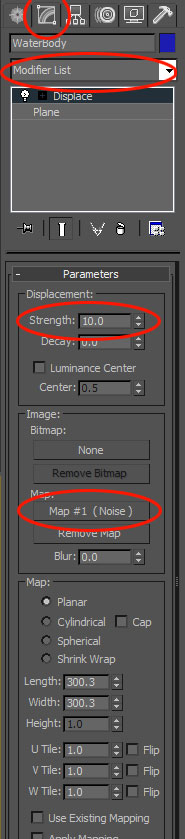
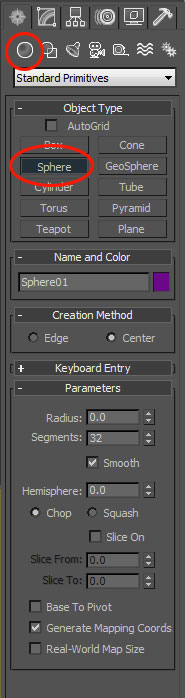
[1.1] Under the Create Panel select Standard Primitives if it isn't already
and choose Plane. Drag it out in your perspective viewport and set the length
and width to 300.
Name it WaterBody and set the color to water blue for now.
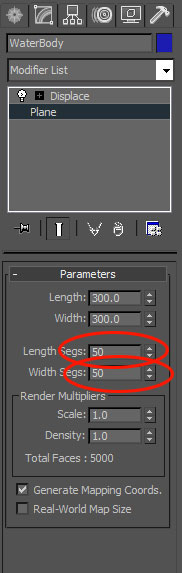
[1.2] With "Plane" selected, go under the Modify or Modifier tab, choose from the Modifier list Displace to apply it to the Plane object. Click on the button marked None under Image: > Map: and choose from the list "Noise". Then set the Strength to 10.0. Nothing happens. This is because we don't have enough polygons in our plane to represent the displacement. Choose your plane layer again under Displace and set the Length and Width segs to 50. The plane is distorted.
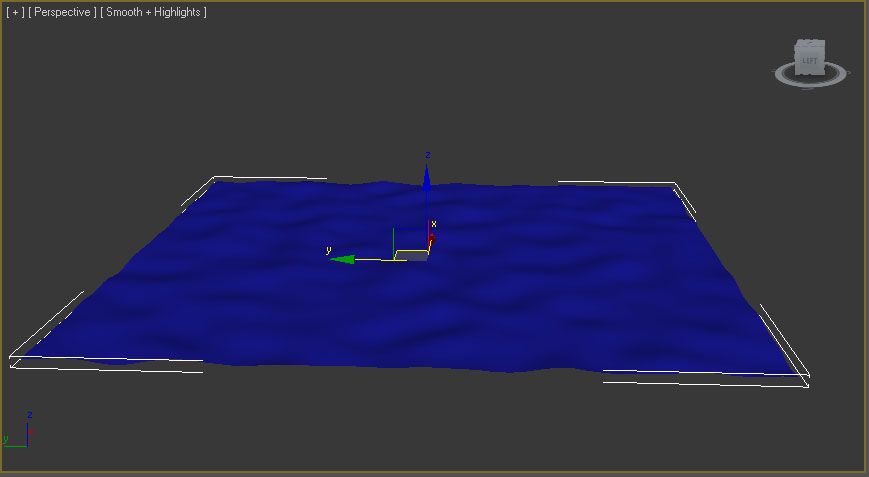
Zoom in and re-orient to fill the frame and give it a natural perspective. You can maximize a viewport with the keyboard shortcut Alt+W. Once you're satisfied, choose Create > Camera >Create Camera from View (Ctrl+C)
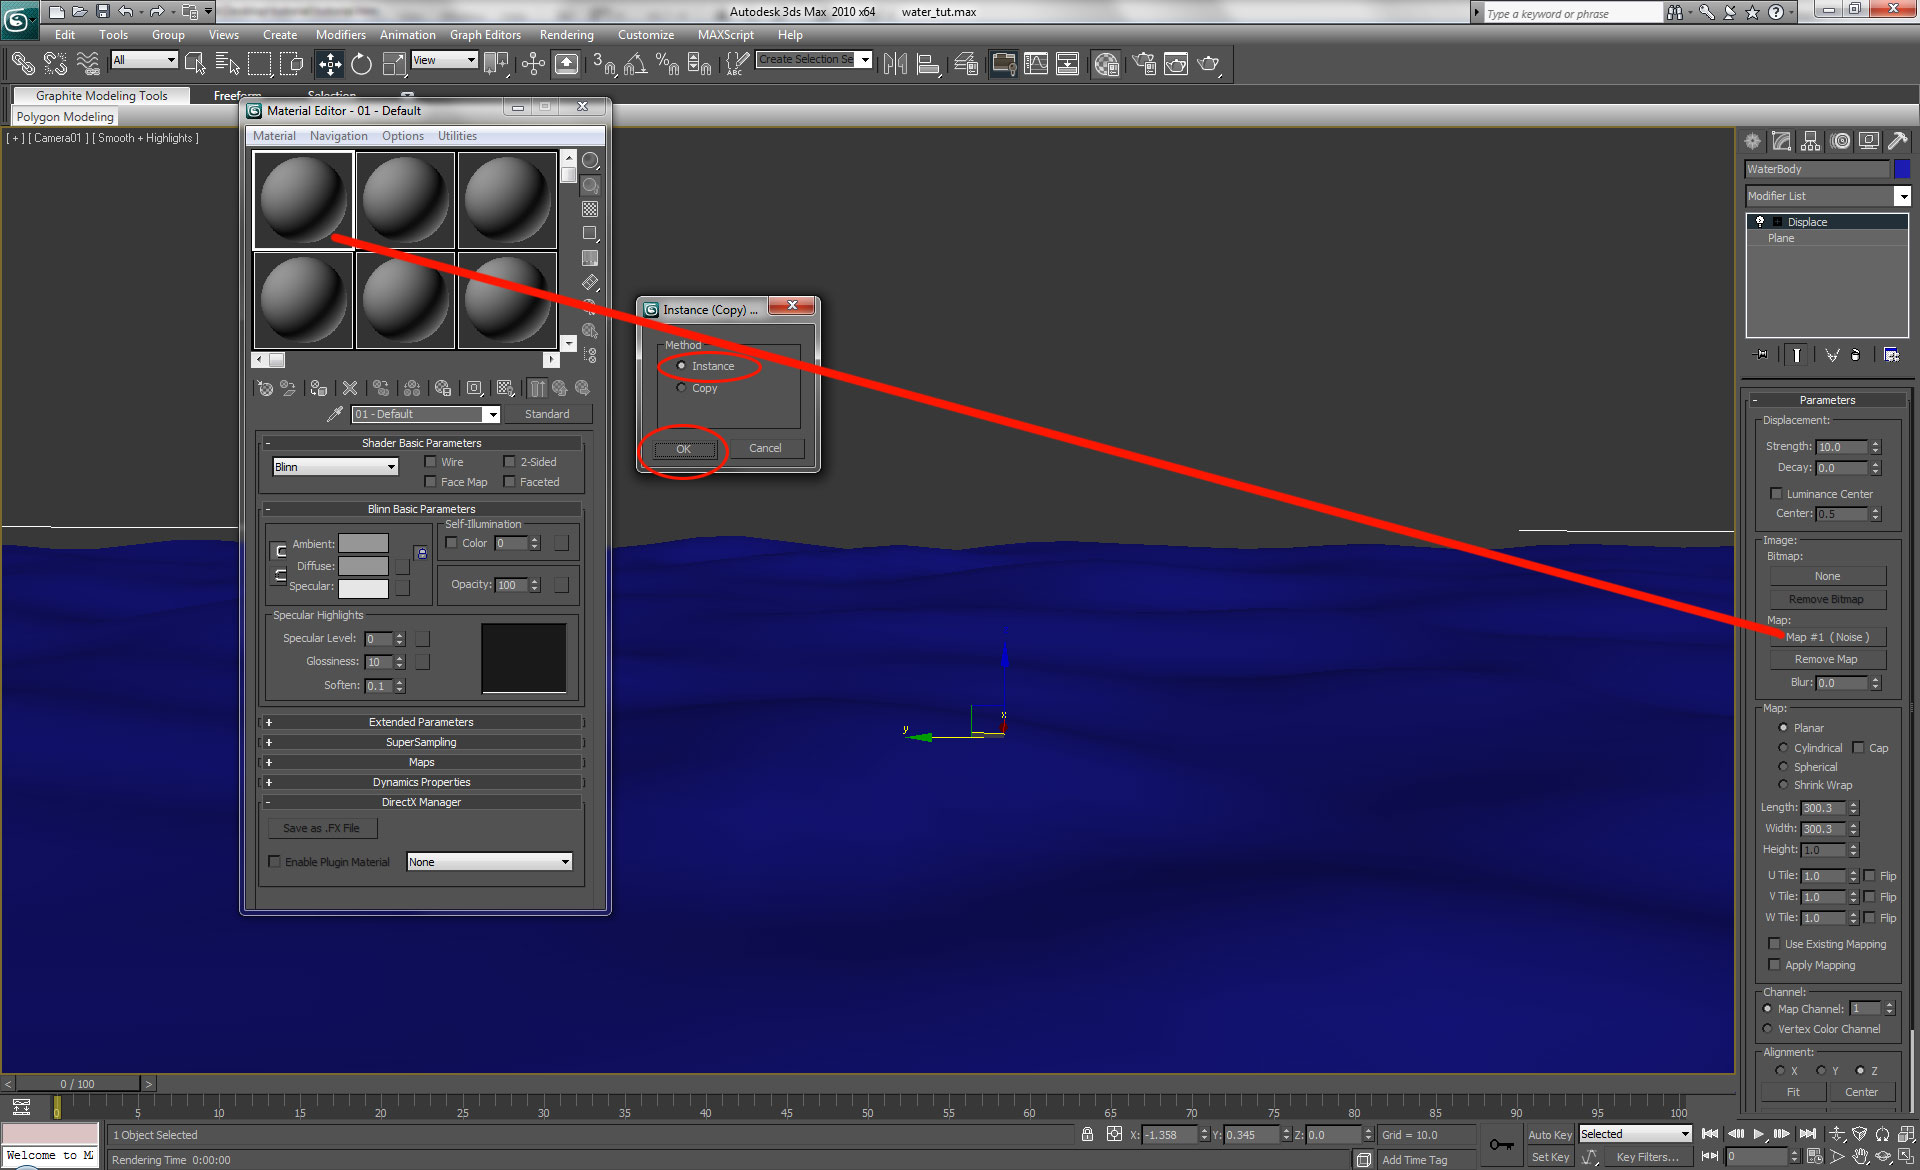
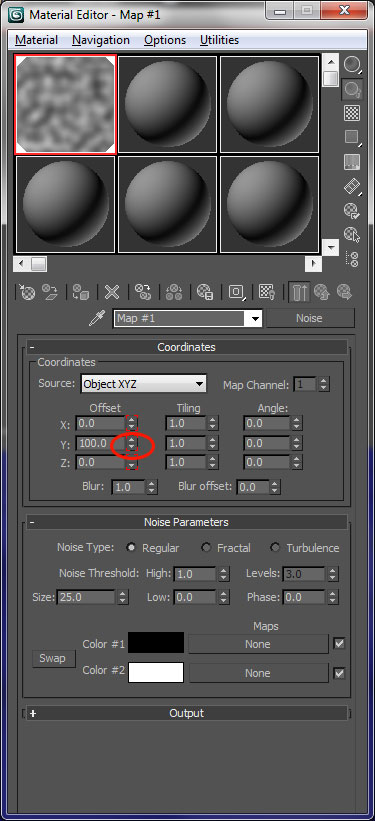
[1.3] Now lets animate our swells. Click the
Material Editor button (![]() )
or hit M to bring up the Material Editor. Drag the Map into a material slot as
an instance. Now we can manipulate it from within the Material Editor.
)
or hit M to bring up the Material Editor. Drag the Map into a material slot as
an instance. Now we can manipulate it from within the Material Editor.
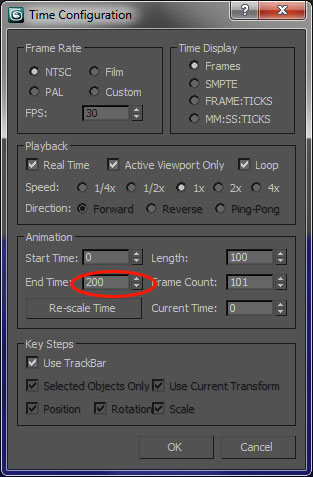
Our animation will be 200 frames. Click the time configuration (![]() )
button in the bottom right and change the end time to 200 from the default 100.
)
button in the bottom right and change the end time to 200 from the default 100.
Click the Autokey button (![]() )
to turn on Autokey mode, then click on the Key button (
)
to turn on Autokey mode, then click on the Key button (![]() )
to set a keyframe at frame 1, then drag the playhead to the last frame, frame
200.
)
to set a keyframe at frame 1, then drag the playhead to the last frame, frame
200.
Change the value for Y offset to 100. A keyframe will be dropped for you
automatically. Press the Play Animation (![]() )
button to watch the animation. Click the Autokey button again to toggle it off.
)
button to watch the animation. Click the Autokey button again to toggle it off.
| Step 2: Adding and Animating the Ripples |
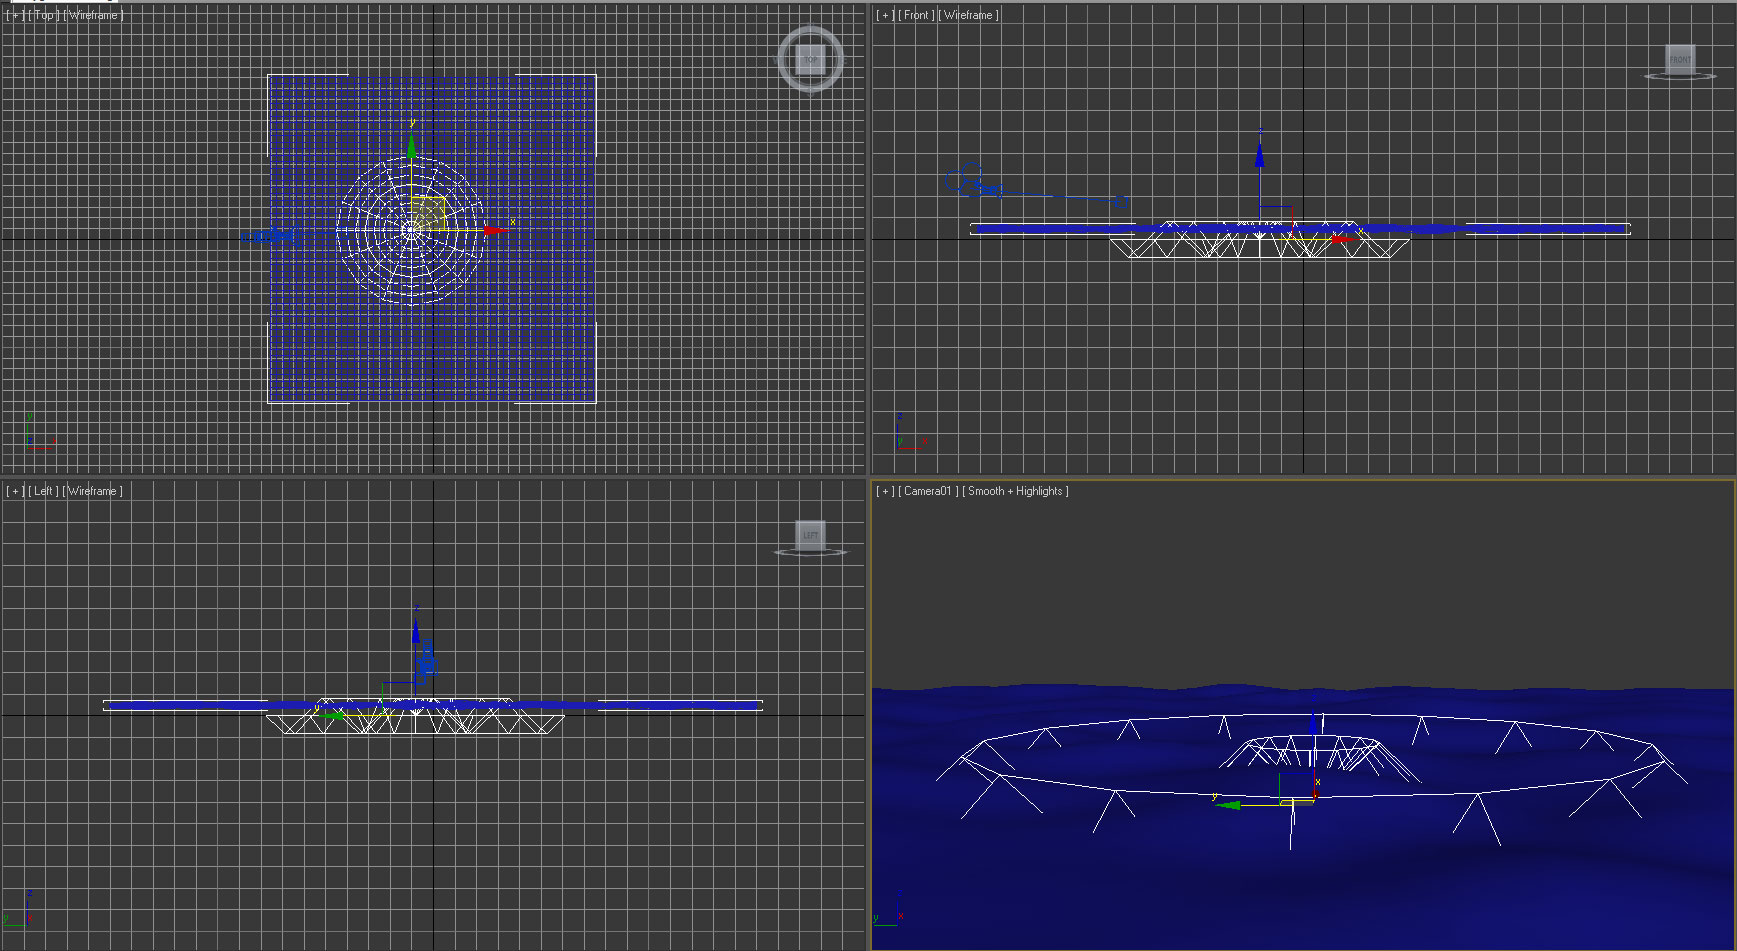
Click on the modify tab, then click the space warps button (![]() ),
set the pulldown menu to Geometric/Deformable, then click the Ripple button and
drag out the space warp in your top viewport. Move it towards the camera until
its framed up nicely in the perspective viewport.
),
set the pulldown menu to Geometric/Deformable, then click the Ripple button and
drag out the space warp in your top viewport. Move it towards the camera until
its framed up nicely in the perspective viewport.
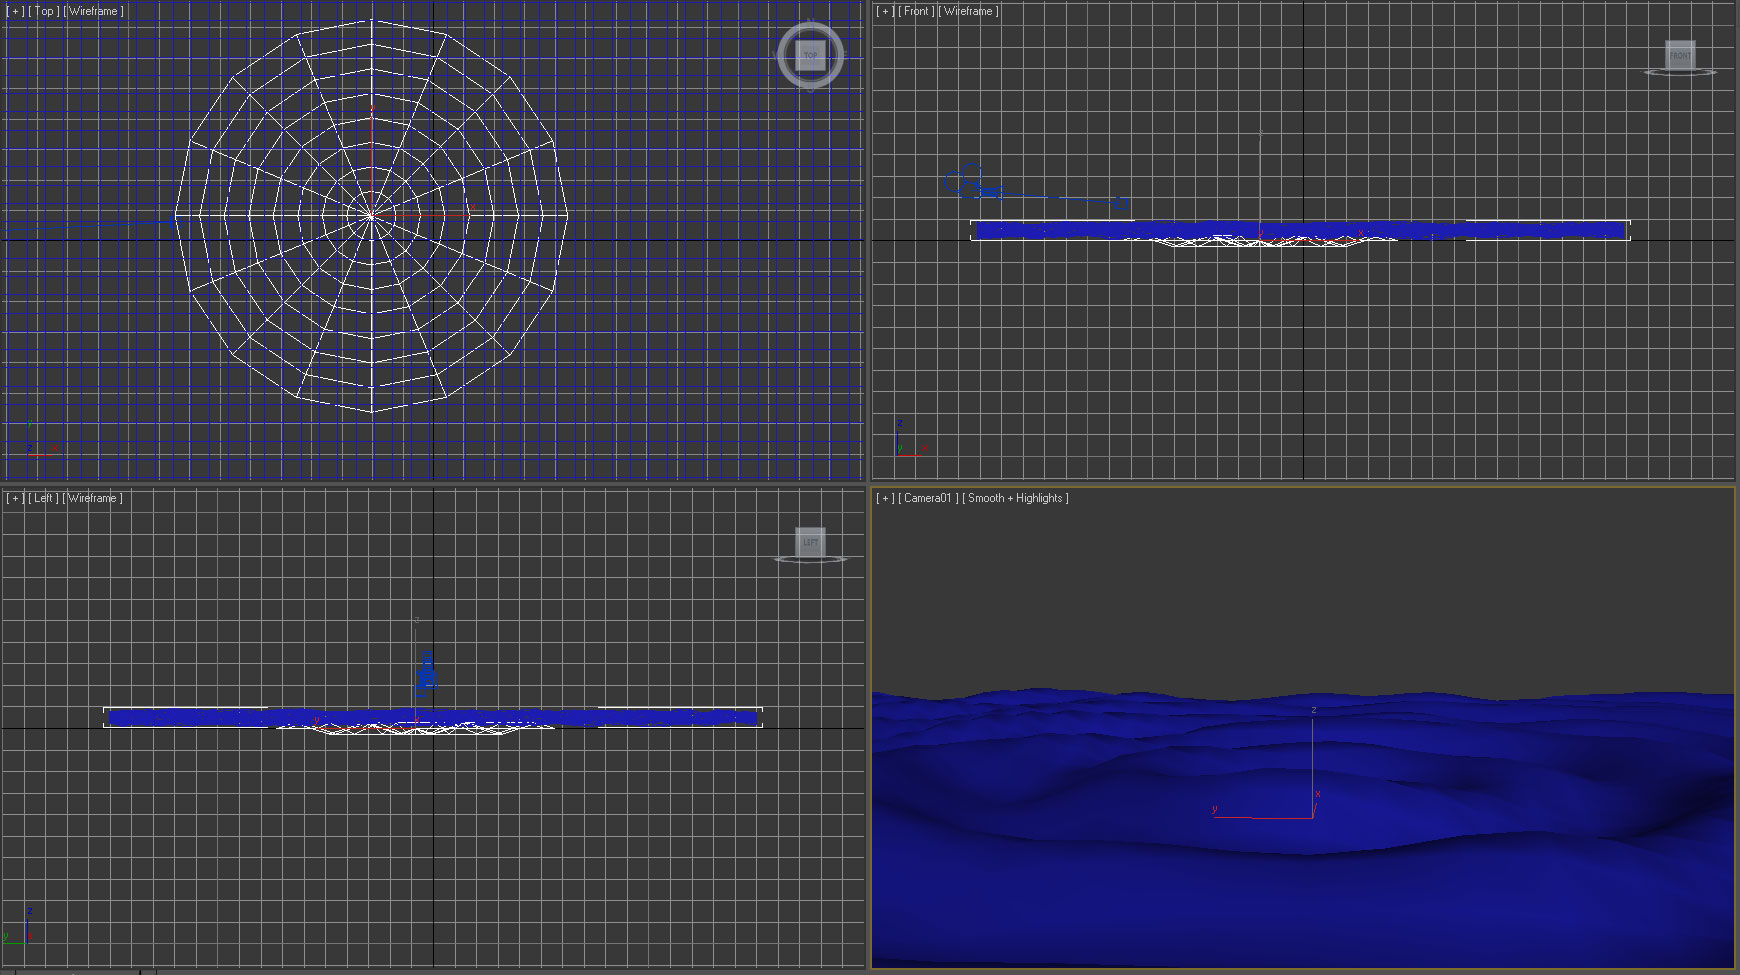
Now we apply our ripple space warp to the plane. Click the Bind to Space Warp
button (![]() )
from the main toolbar. In the top viewport, click and drag from the space warp
object to the plane. Alternatively you can select the space warp, click the
Select by Name button (
)
from the main toolbar. In the top viewport, click and drag from the space warp
object to the plane. Alternatively you can select the space warp, click the
Select by Name button (![]() )(H)
and select the plane "WaterBody" from the list. The objects will blink
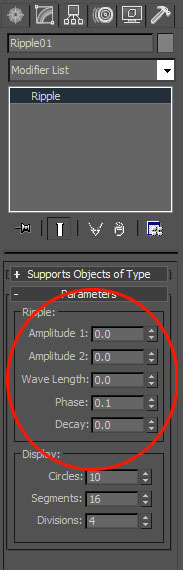
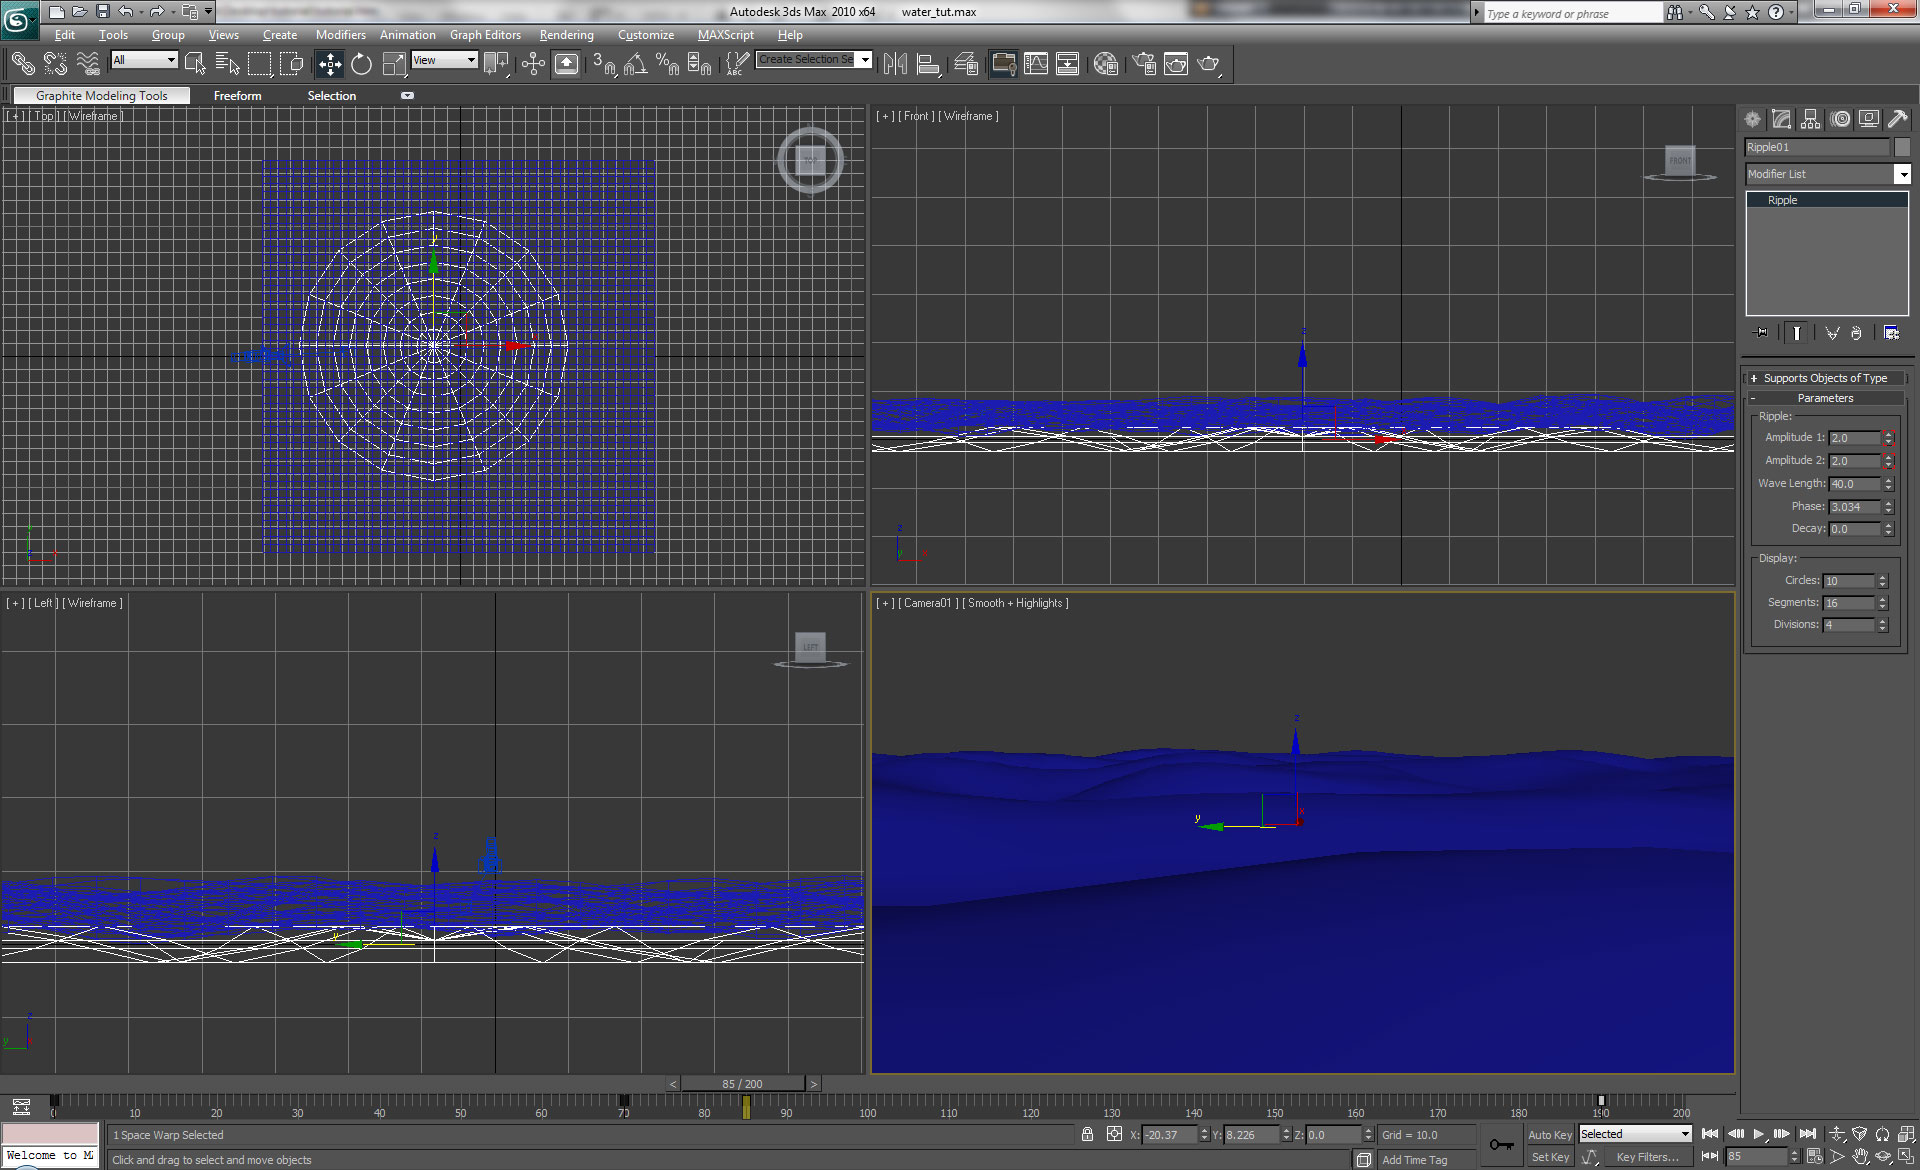
indicating that they are bound. Set the Amplitude 1 and 2 to around 2.0 and Wave
Length to about 25 for now.
)(H)
and select the plane "WaterBody" from the list. The objects will blink
indicating that they are bound. Set the Amplitude 1 and 2 to around 2.0 and Wave
Length to about 25 for now.
Here's a summary of what each parameter does to our ripple. Feel free to experiment with them before moving on.
| Amplitude 1 and 2 | Controls the height of the waves relative to the z axis |
| Wave Length | Controls the diameter of the waves relative to the x and y axis |
| Phase | Similar to offset in noise, this will ripple the waves outward when decreased |
| Decay | Controls how fast the waves dissipate from the center outward along the x and y axis |
Now lets animate the ripples before we animate the water droplet starting at
frame 70. With your ripple selected, reset the values to 0 for everything under
ripple. You can do this quickly by
right clicking on the increment arrows to the immediate right of the textboxes.
Then we drop keyframes to increment the amplitude and wavelength quickly and
then decrease them over time to simulate the sudden splash and slow dissipation
respectively.
Hit the Autokey button (![]() )
to toggle on Autokey, then hit the key button (
)
to toggle on Autokey, then hit the key button (![]() )
to drop a keyframe. Slide the timeline playhead over to around 85, change the
Amplitude 1 and 2 values to 2.0.
)
to drop a keyframe. Slide the timeline playhead over to around 85, change the
Amplitude 1 and 2 values to 2.0.
Slide the playhead to frame 190. Once again, reset the values to 0. Our
WaterBody is animated. Click the Autokey button again to toggle it off.
| Step 3: Creating and Animating the Water Droplet |
Lets take a moment to crudely model a water droplet -- we won't spend much
time on it because it will only be visible for a few frames. Click the Geometry
button (![]() ), then
the sphere button, and drag out a sphere in the top viewport.
), then
the sphere button, and drag out a sphere in the top viewport.
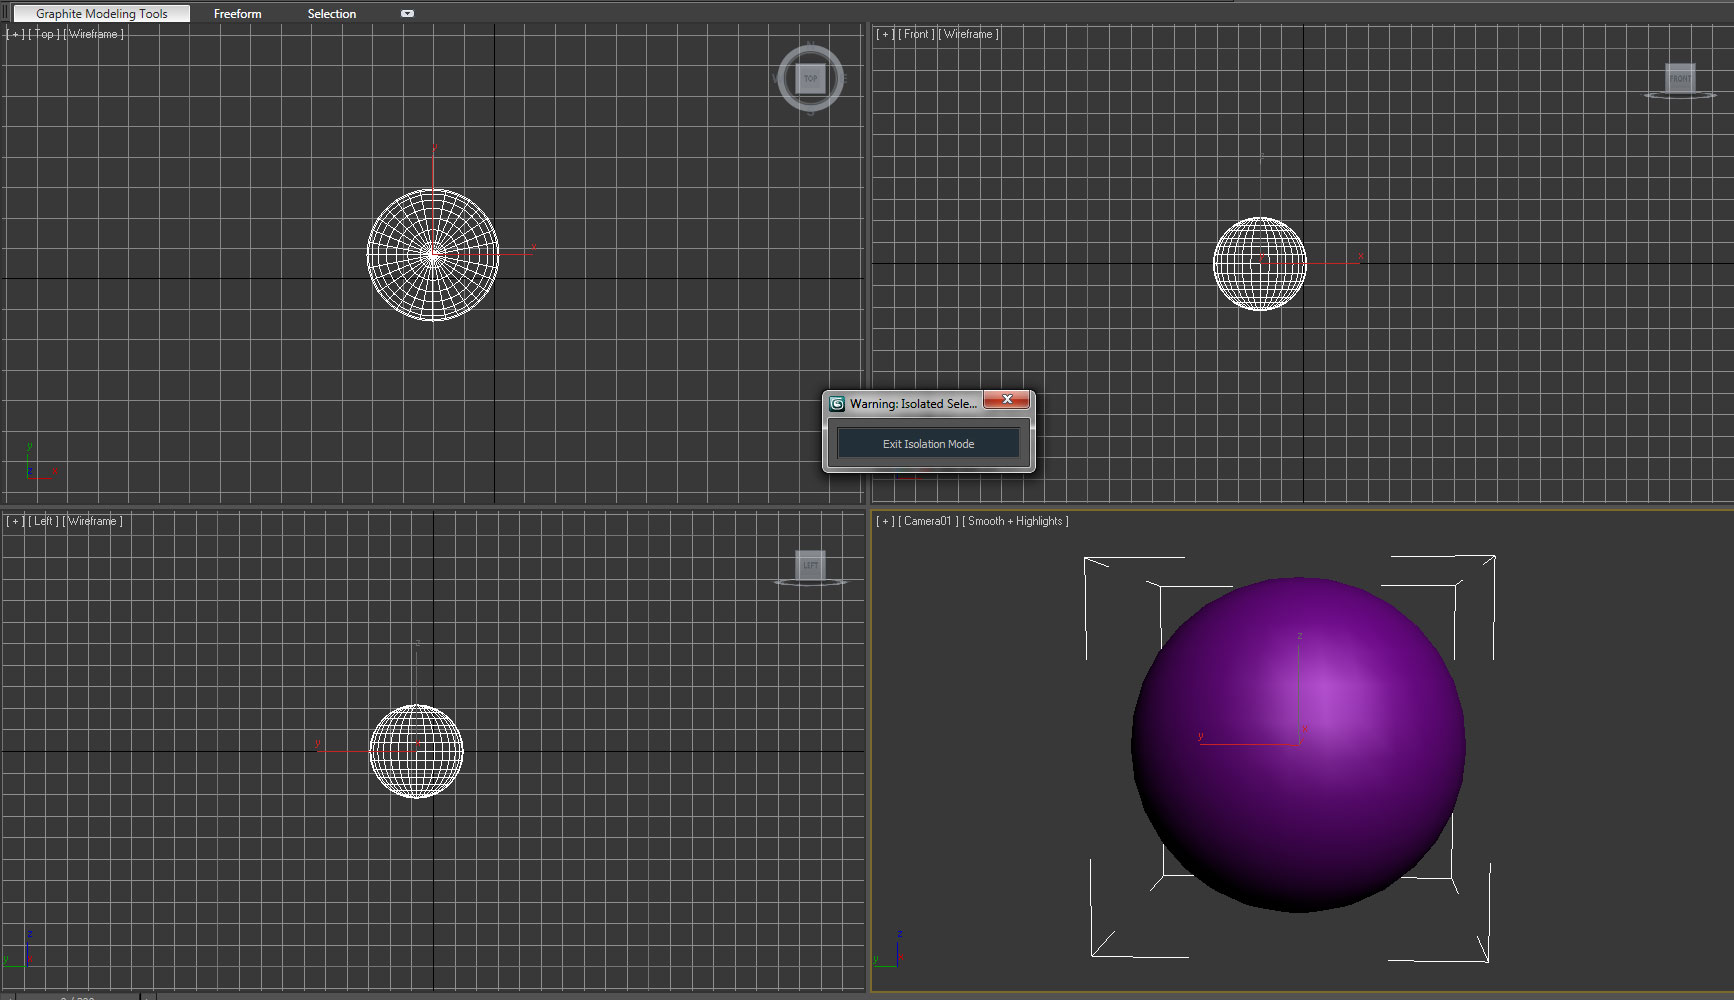
Make sure to align the sphere to the center of the ripple, then set the radius
to around 20 and name it WaterDroplet. With the sphere selected, go to Tools >
Isolate Selection (Alt+Q). With the front viewport selected, click the zoom
extends
all button (![]() )
from the bottom right and maximize the viewport (alt+w).
)
from the bottom right and maximize the viewport (alt+w).
[3.1] Next lets model the sphere into a water droplet shape. Right click on
the sphere, choose Convert to: > Convert to Editable Poly. Set the selection to
vertices and turn on soft selection. Soft selection allows you to manipulate
neighboring verts and manipulate geometry almost like hand modelling clay.
Highlight rows of verts on the top and the bottom by clicking and dragging a
selection and using the move tool and scale tool until you get something
similar to what I have below. Exit Isolation Mode.

[3.2] Now lets animate it. Drag your water droplet upwards along the Y axis
in the front viewport until its slightly out of the frame of the camera in the
camera/perspective viewport. Drag
the playhead on the timeline to frame 60, hit the autokey button (![]() )
to toggle it on, hit the key button (
)
to toggle it on, hit the key button (![]() )
to drop a keyframe, then drag the playhead to around frame 75 and
)
to drop a keyframe, then drag the playhead to around frame 75 and
move the WaterDrop under our distorted plane WaterBody so it isnt visible. A
keyframe will automatically be dropped. Our WaterDrop is animated.
Click the Autokey button again to toggle it off.
Lets sync our drop with our ripple better since the ripple is a secondary
action of the drop hitting the water. Drag the playhead to where the ripples
first start (frame 77). Click and drag to highlight your keyframes in the
timeline
and drag them such that your drop hits the water right when the ripples begin.
My Drop begins animating on frame 66 and ends on 81, but because its relative to
the distance the drop falls yours may be different.
Our animation for this project is complete. Click the Autokey button again to toggle it off.

![]()

| Step 4: Creating a Water Material |
lastly we create a material for our WaterBody and WaterDroplet. Click on the
Material Editor button (![]() )(M)
and select a new material. Click on the diffuse box and choose
)(M)
and select a new material. Click on the diffuse box and choose
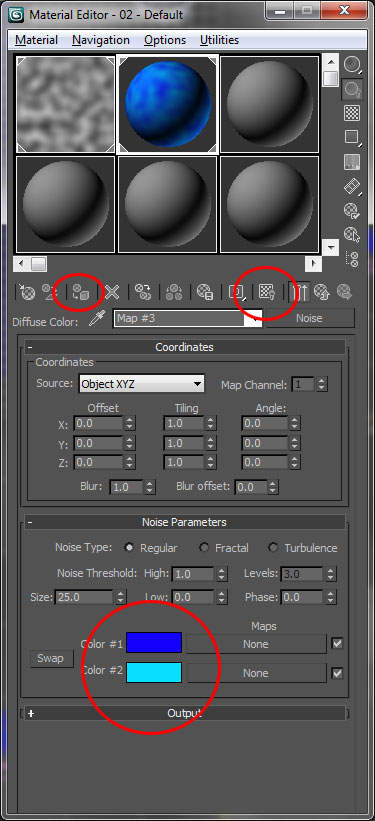
Noise from the Material Browser.
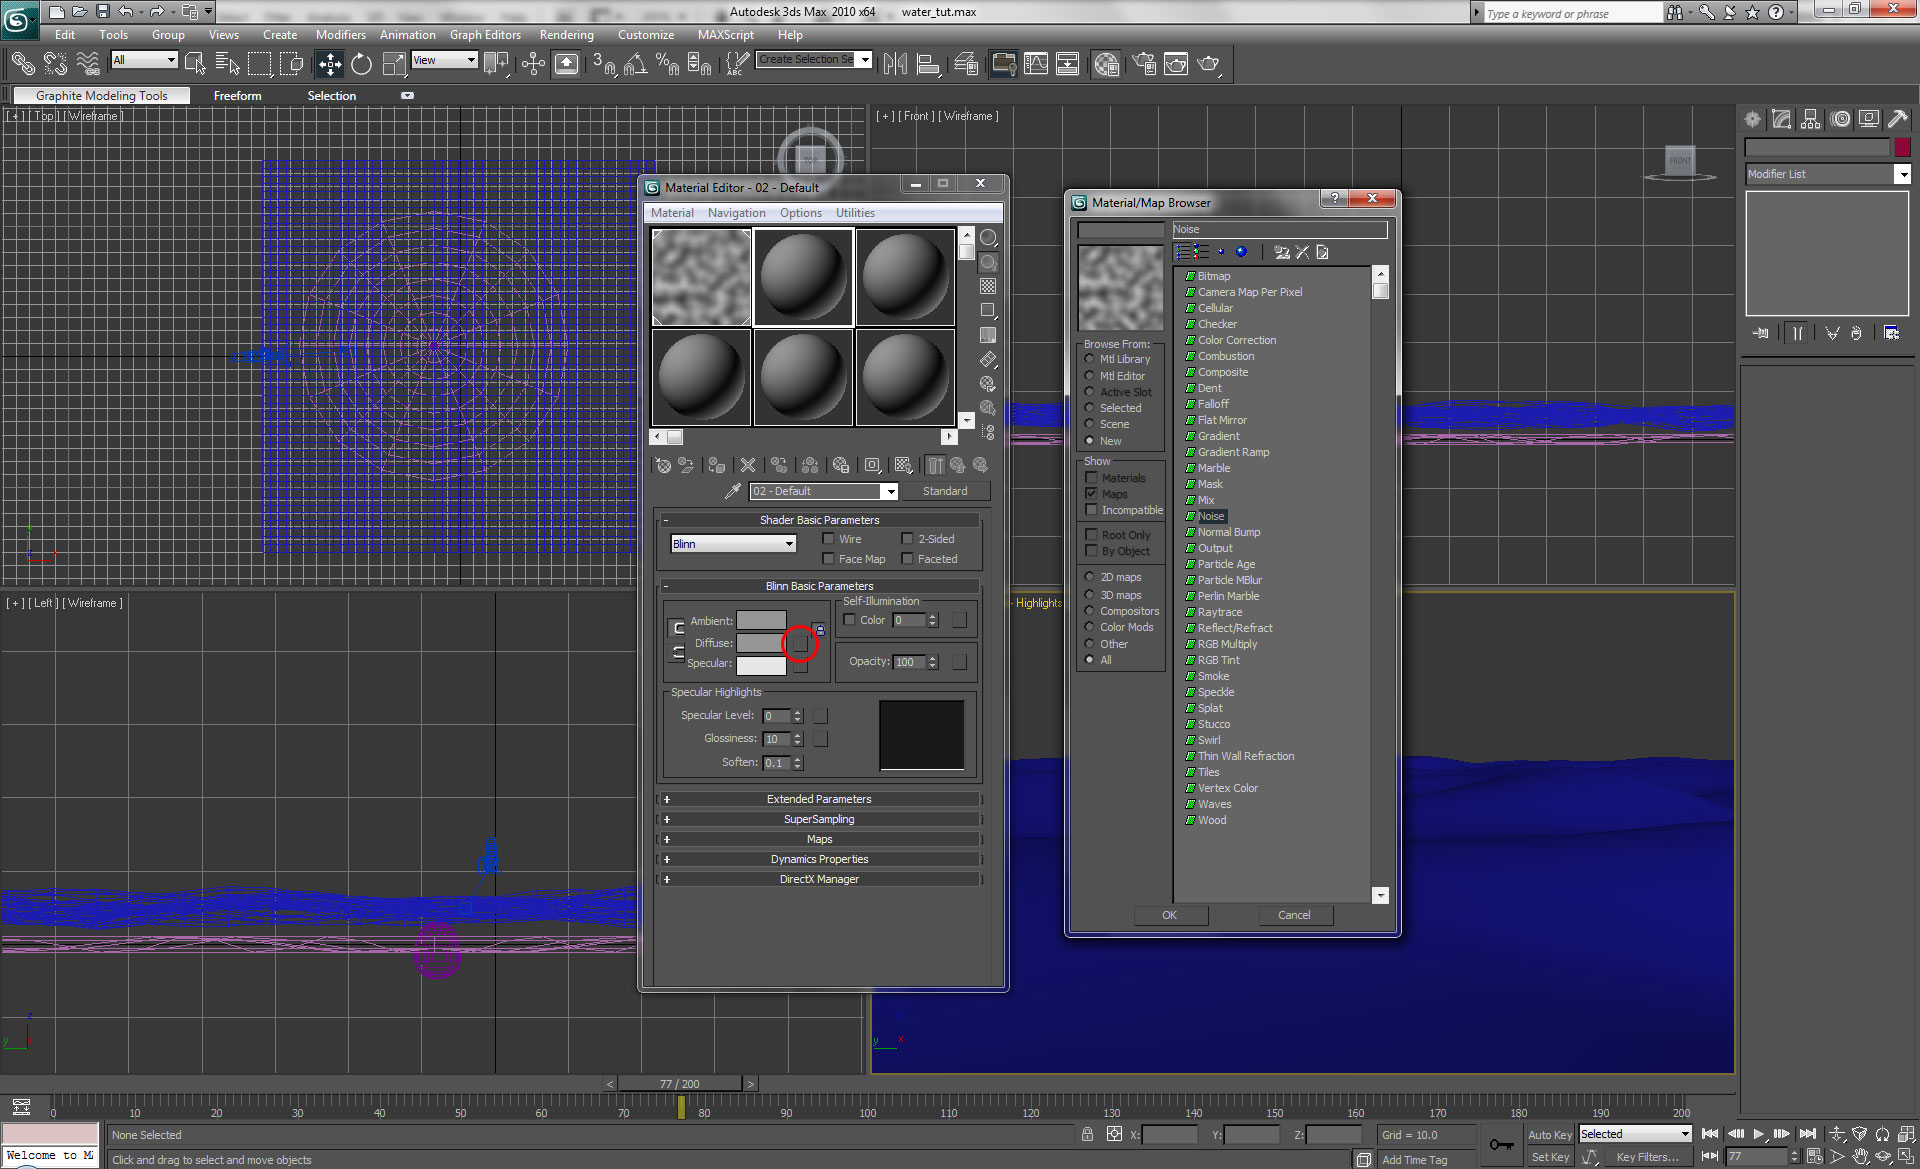
For the colors, choose a dark blue and a light blue/teal. Go to your
perspective viewport and press control+a to select all, then click the assign
material to selection button (![]() )
to apply the material. Click the Show map in standard viewport button (
)
to apply the material. Click the Show map in standard viewport button (![]() )
to view your material applied in the perspective viewport.
)
to view your material applied in the perspective viewport.
Lastly lets add some specular highlights. Click the up one level button (![]() )
to get out of your diffuse sub-material parameters, twirl down the Maps tab, and
checkmark reflection.
)
to get out of your diffuse sub-material parameters, twirl down the Maps tab, and
checkmark reflection.
Choose the None box to the right of it and from the Material Browser choose
Raytrace.
Raytrace materials are like mirrors that reflect geometry from your scene. For example, you might use a Raytrace material on a glass table to reflect a lamp sitting upon it.
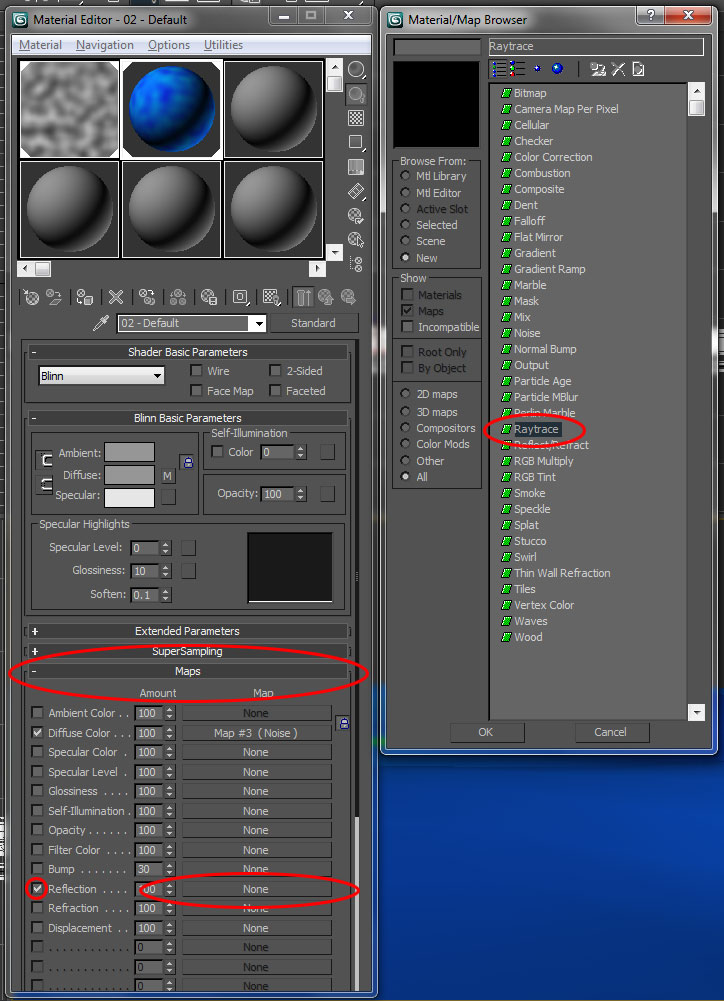
Once the material's been applied, click the Up One Level button (![]() )
and change the material's amount to around 50. We've created our material.
)
and change the material's amount to around 50. We've created our material.
Close the material Editor.
![]()
Click the Render Setup button (![]() )
and hit the Render button to see a preview of your scene at full quality.
)
and hit the Render button to see a preview of your scene at full quality.
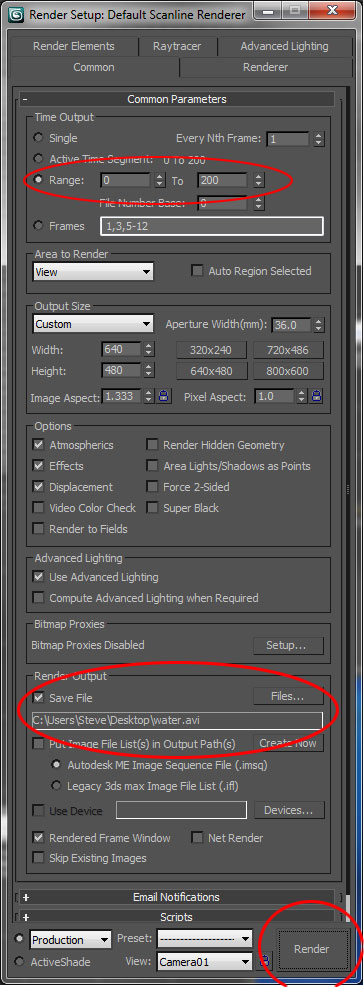
| Step 5: Rendering the Scene |
Finally lets render the scene out as a video.
Click on the Render Setup button (![]() ).
).
Set the range for 0-200. Under render output, Check save file, Then click the
files button and browse to a folder to export to and a format. I chose my
desktop and .avi format respectively.
Click the render button and your project will be rendered to video.